














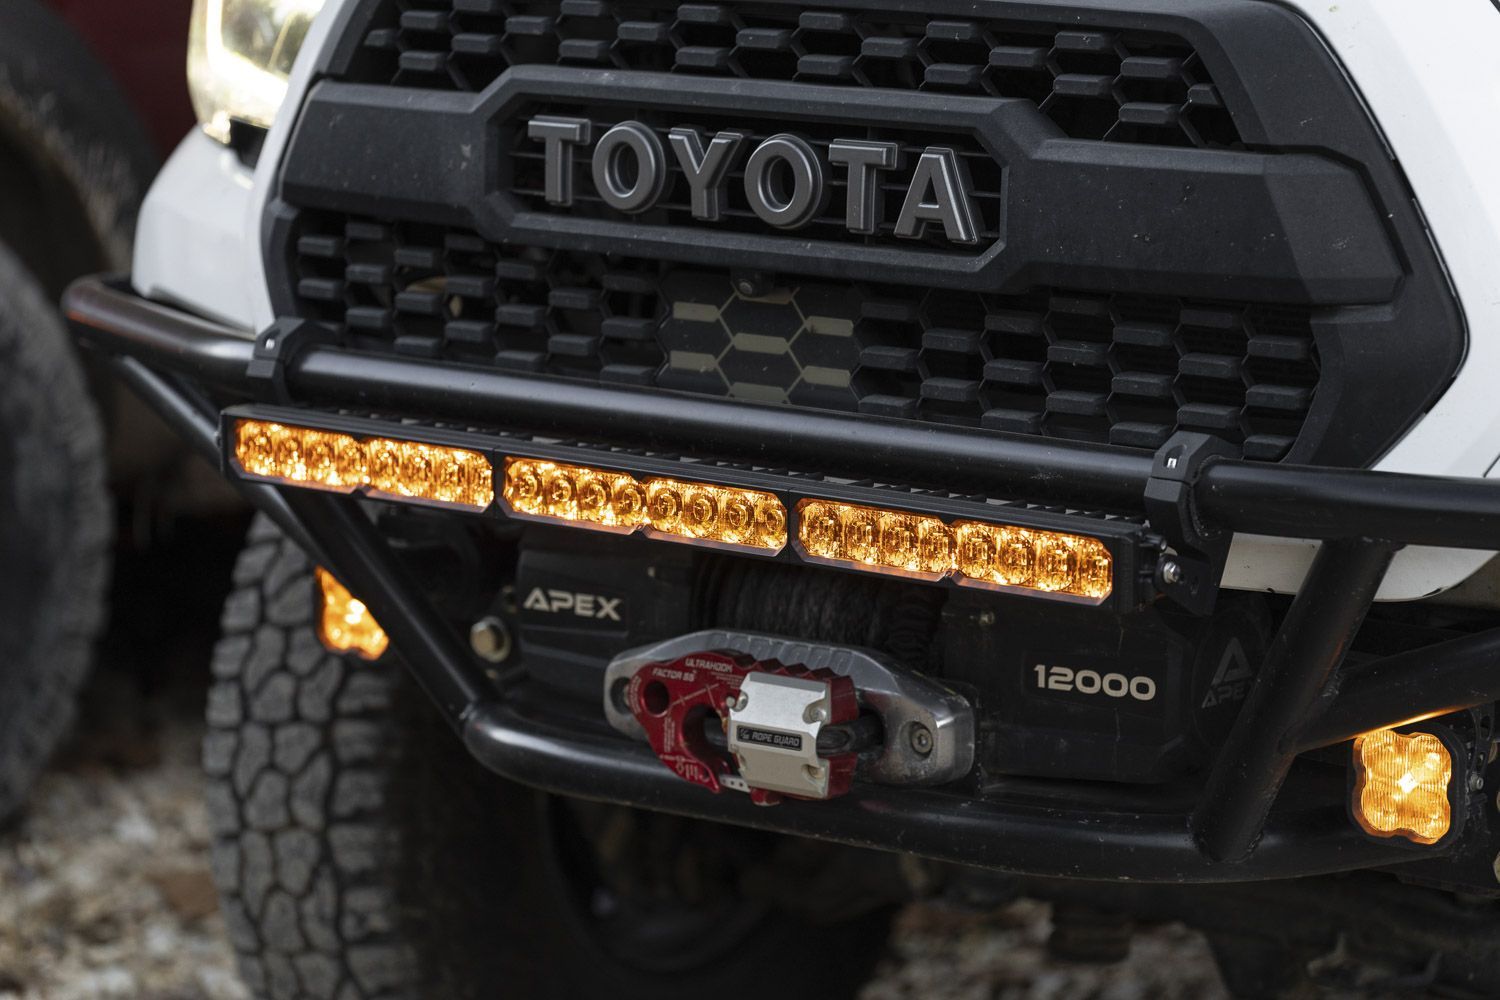
Stage Series LED Lightbars deliver serious output and durability in a completely redesigned package. Designed for maximum functionality, both options feature high-intensity LED chips, custom-engineered TIR (Total Internal Reflection) optics, and powder-coated aluminum construction built to handle the elements.
All LED Lightbars are available in 6000k cool white, 3000k selective yellow output, or dual-color and include a distinctive backlight for a unique, modern look. With their versatile beam patterns, multiple functions, and easy installation, they’re perfect for roof racks, bumpers, and more.
The following installation guide provides general instructions for mounting the new Stage Series LED Lightbars on your vehicle. Keep reading for details.
Table of Contents
Wiring Instructions
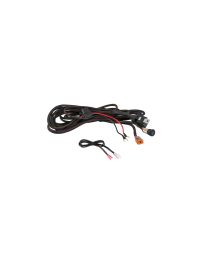
SS6, SS10, and SS20 Stage Series LED Lightbars have an integrated Deutsch-style connector located on the back of the bar, just below the pin-fin heatsink, that securely fits the included Deutsch-style connectors.
The bigger Lightbars (SS30, SS40, & SS50) come with a DTP (Duetch Terminal Power) that are designed for high current applications with a wire lead coming directly out the side of the bar.
Connect the red wire to the positive supply, and the black wire to the negative or common ground. Tap the blue wire for the backlight to your desired vehicle function.
Note: This auxiliary lamp draws high current and requires adequately-sized wiring for safe operation. If you are not using a Diode Dynamics wire harness, use a wire sized 16 AWG or larger for main power and ground. Use a wire sized 18 AWG or larger for the backlight (blue wire on the pigtail). Please be mindful of current ratings and wire size, especially if splitting power signals to multiple lights or using switches. If you have any questions, please feel free to contact us for assistance.
Mounting Instructions
You may use the included hardware and fasteners to mount your lightbar.
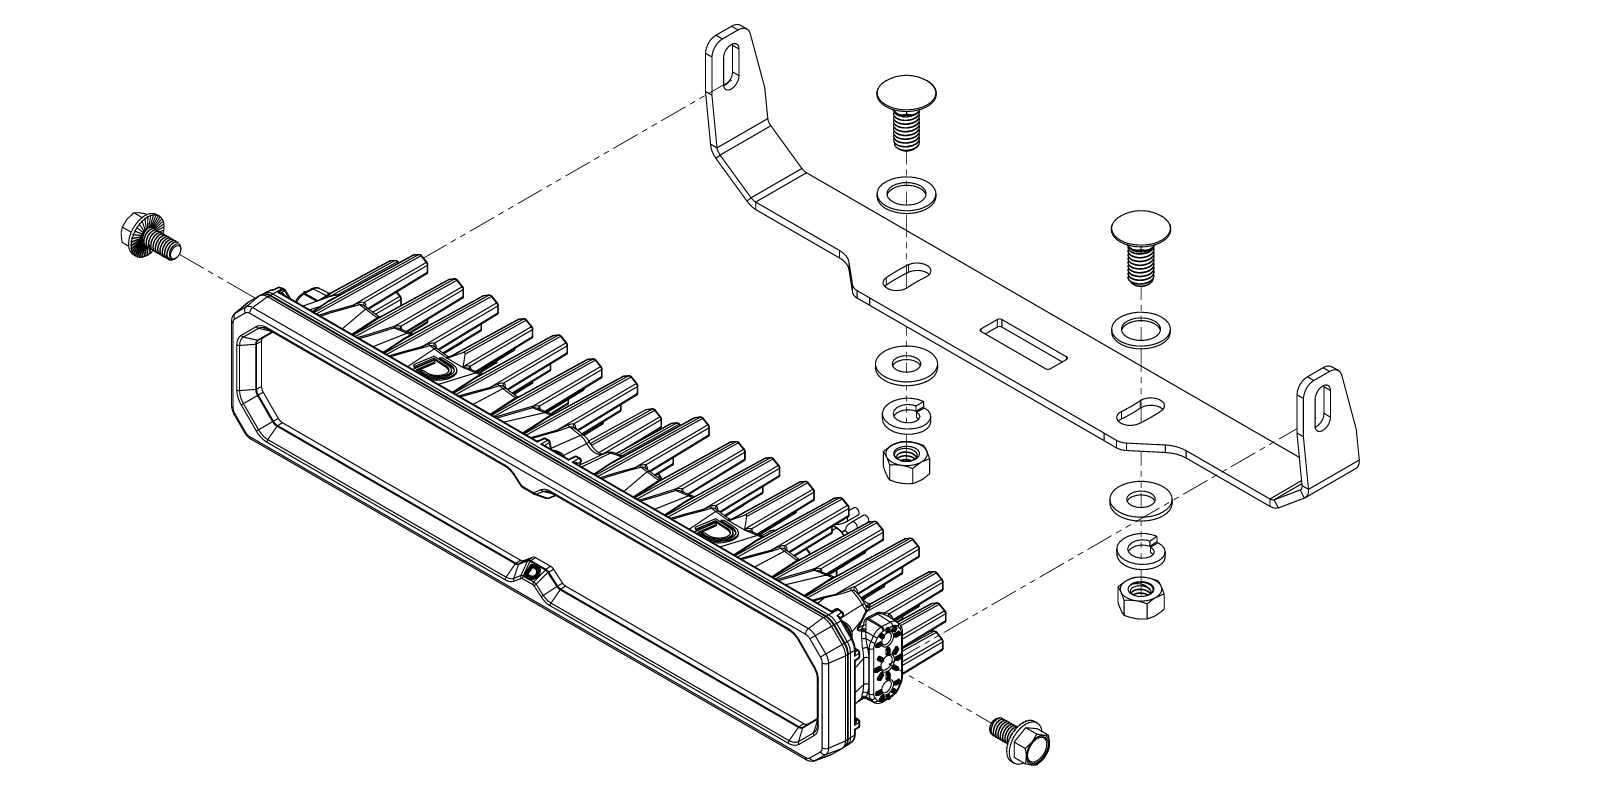
SS6 Lightbar + U-Bracket (Not included in box):

SS6 Lightbar + L-Bracket (included with every lightbar):

SS6 Flush Bezel:


SS6 + Adapter Bracket:

SS10+ L-Bracket (included with every lightbar):
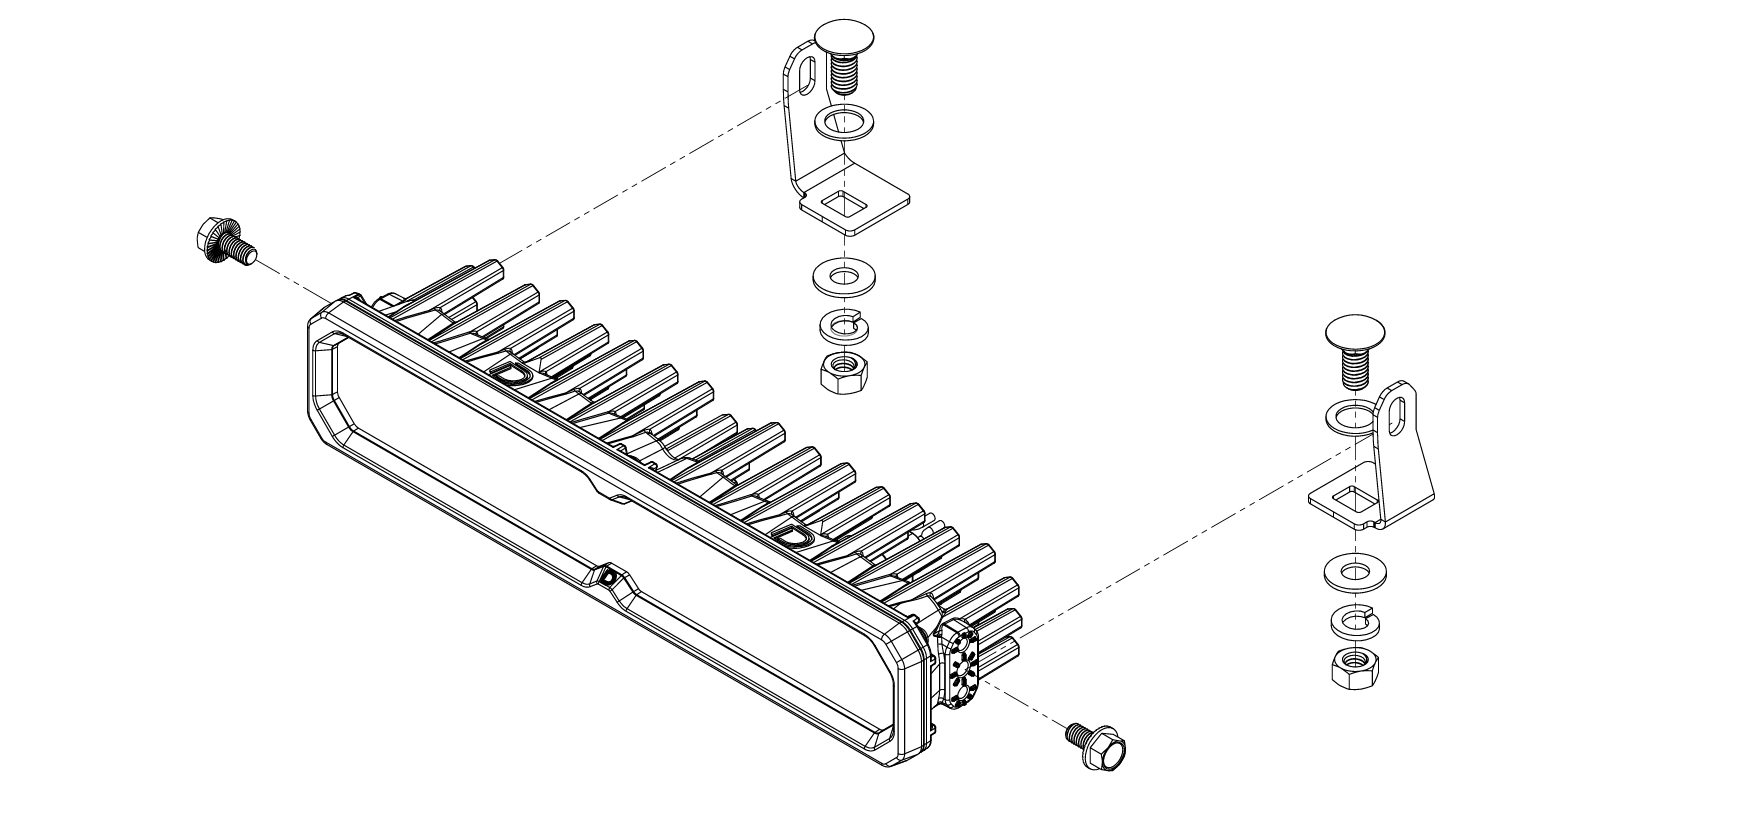
SS10 U-Bracket (Not included in box):
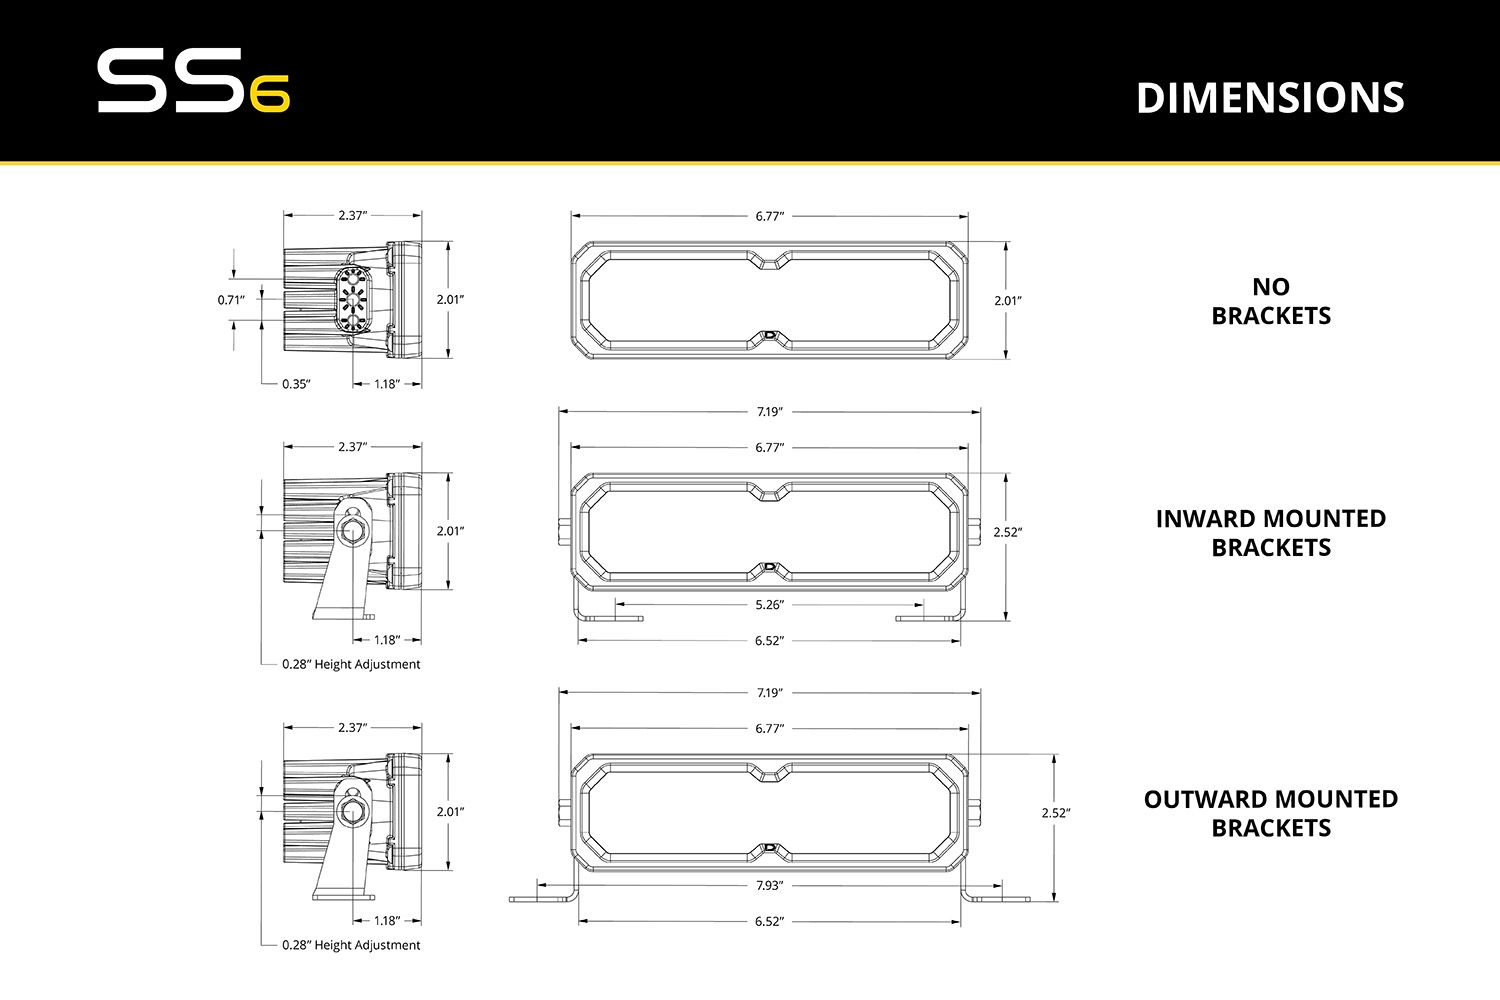
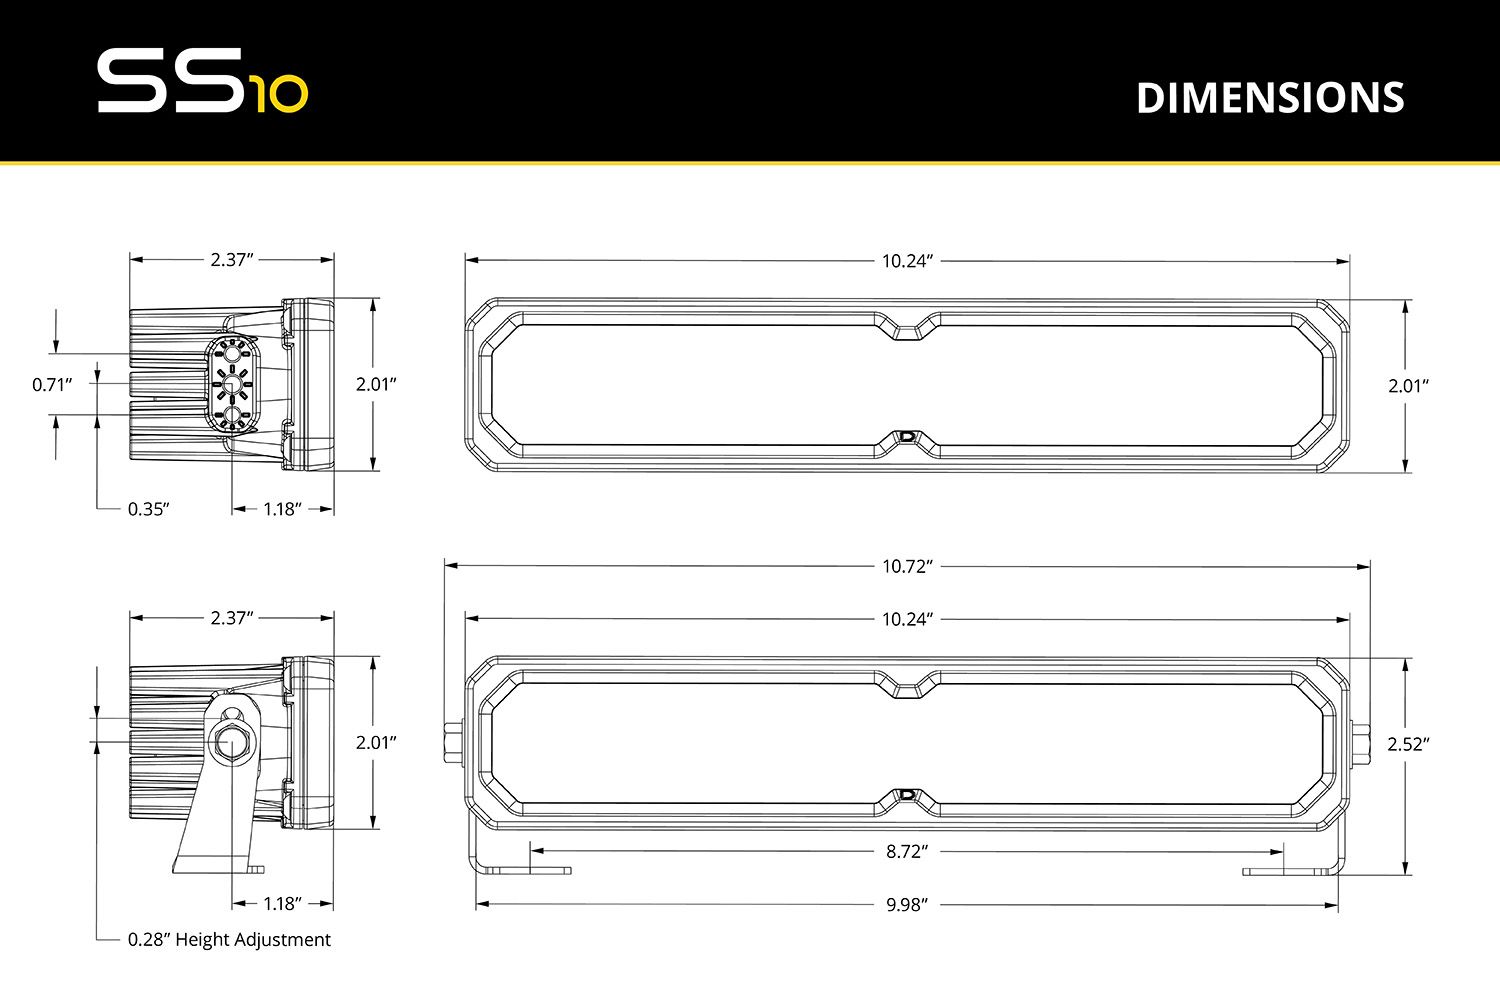
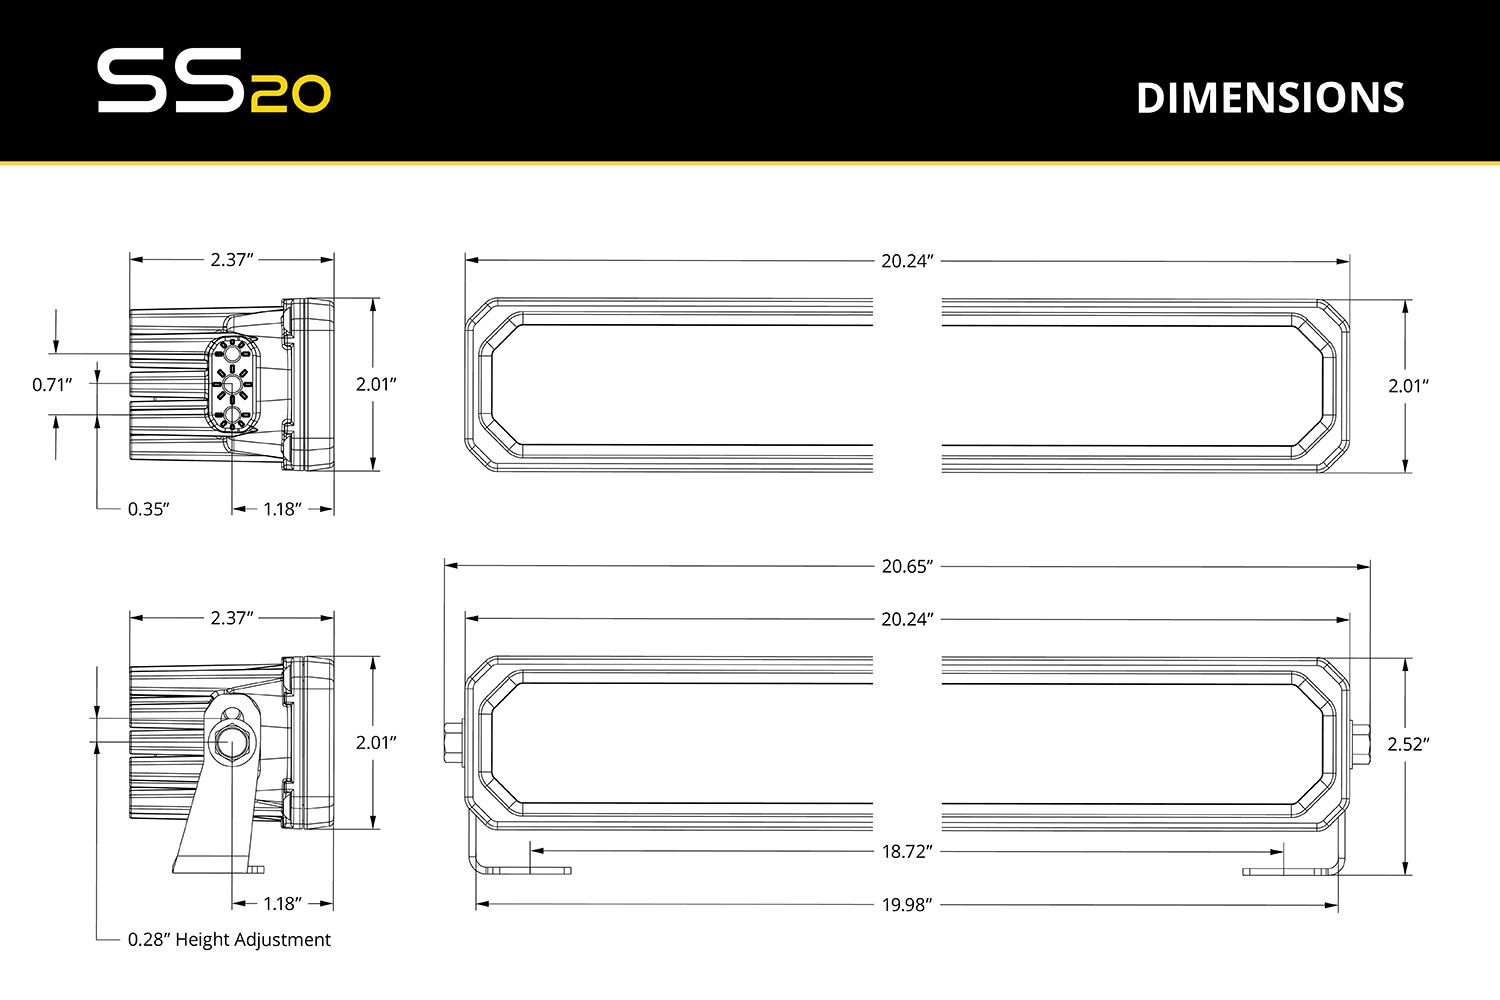
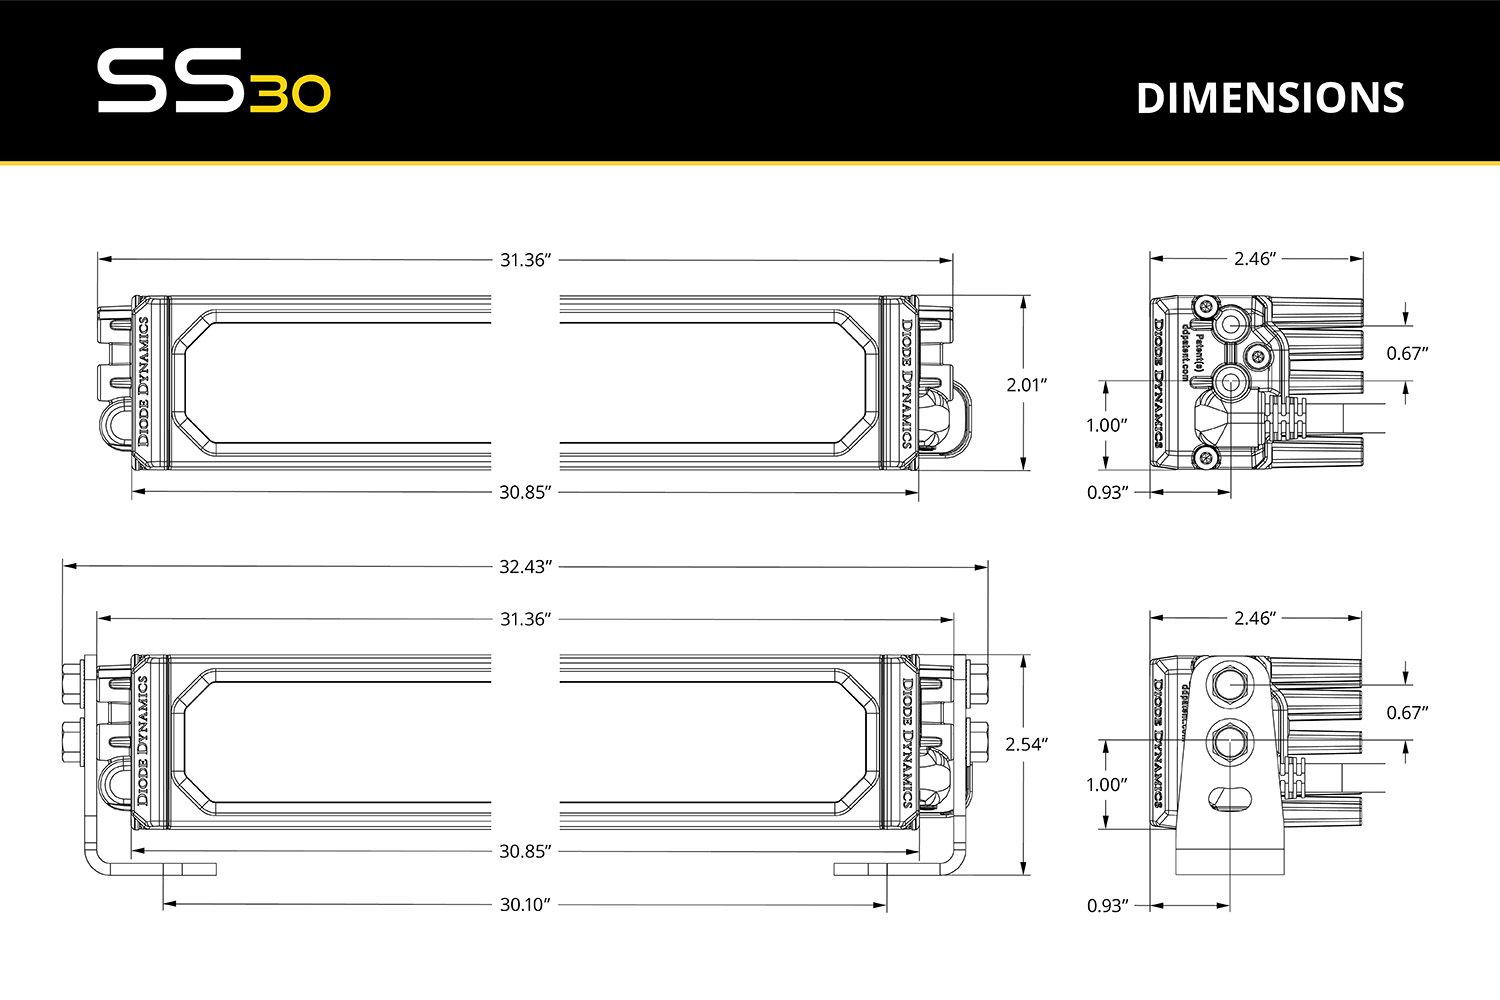
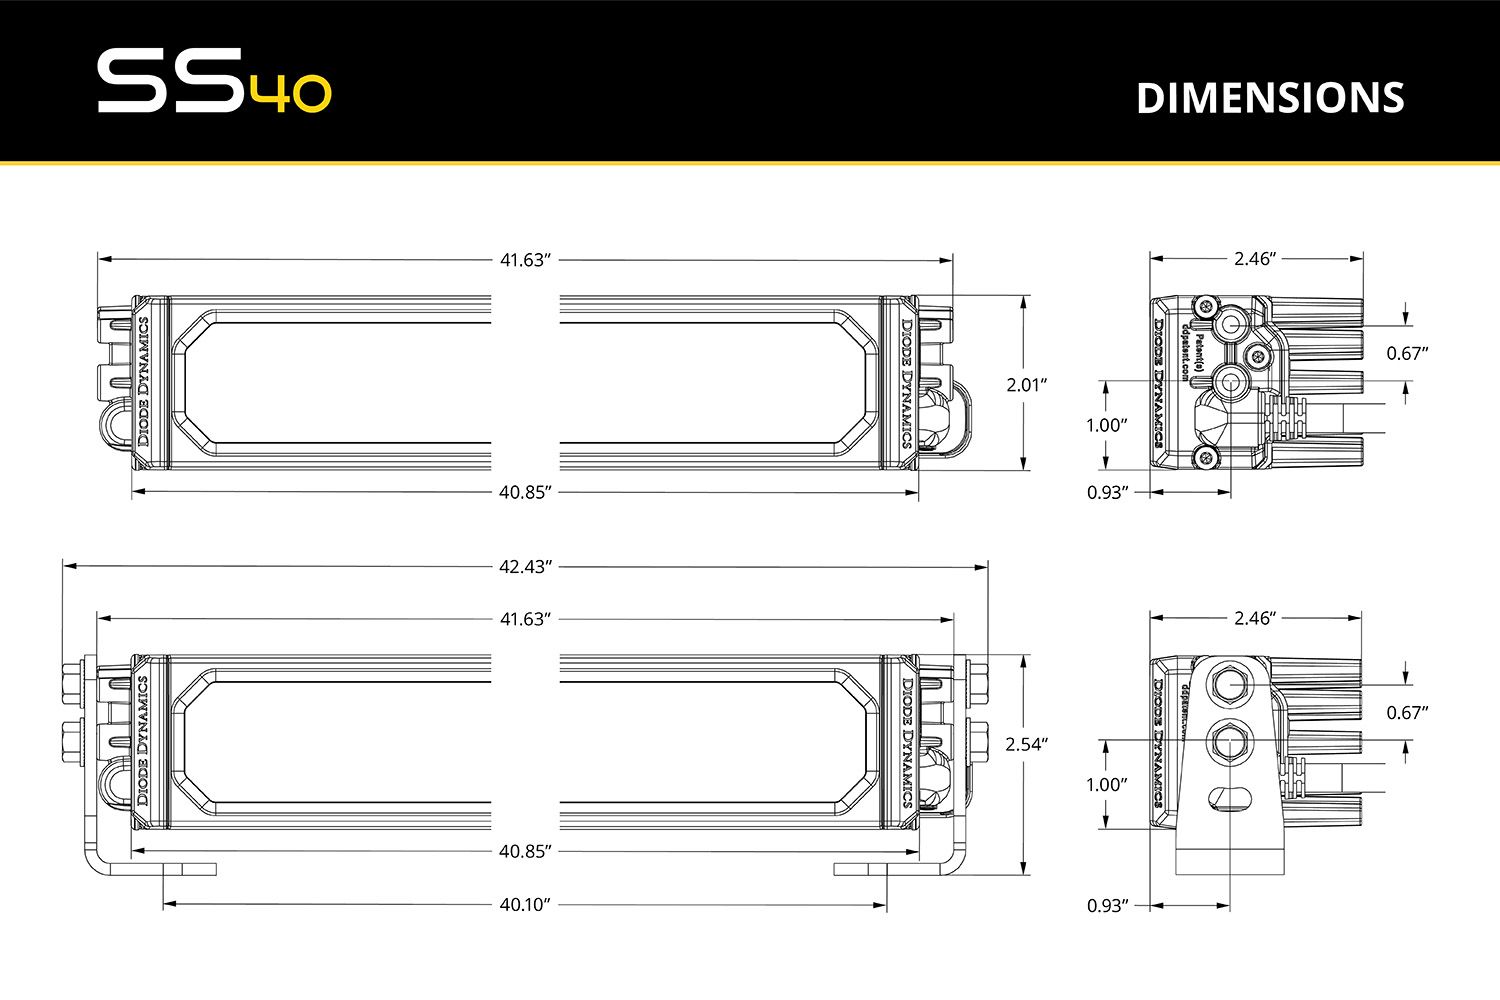
Dimensions
SS6:
SS10:
SS20:
SS30:
SS40:
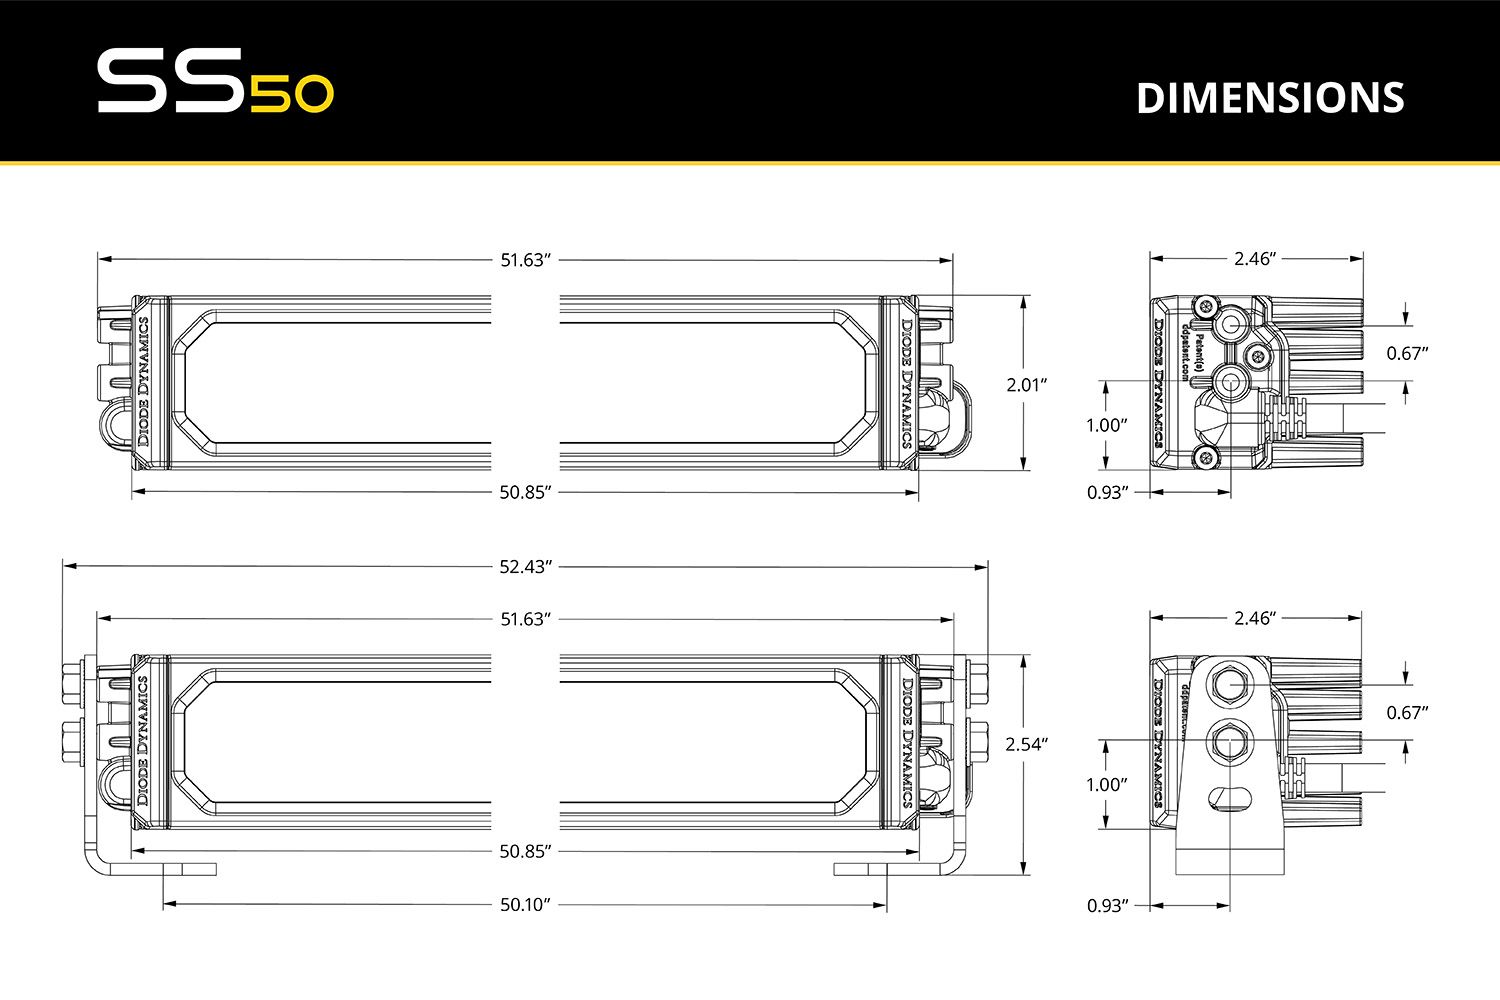
SS50:
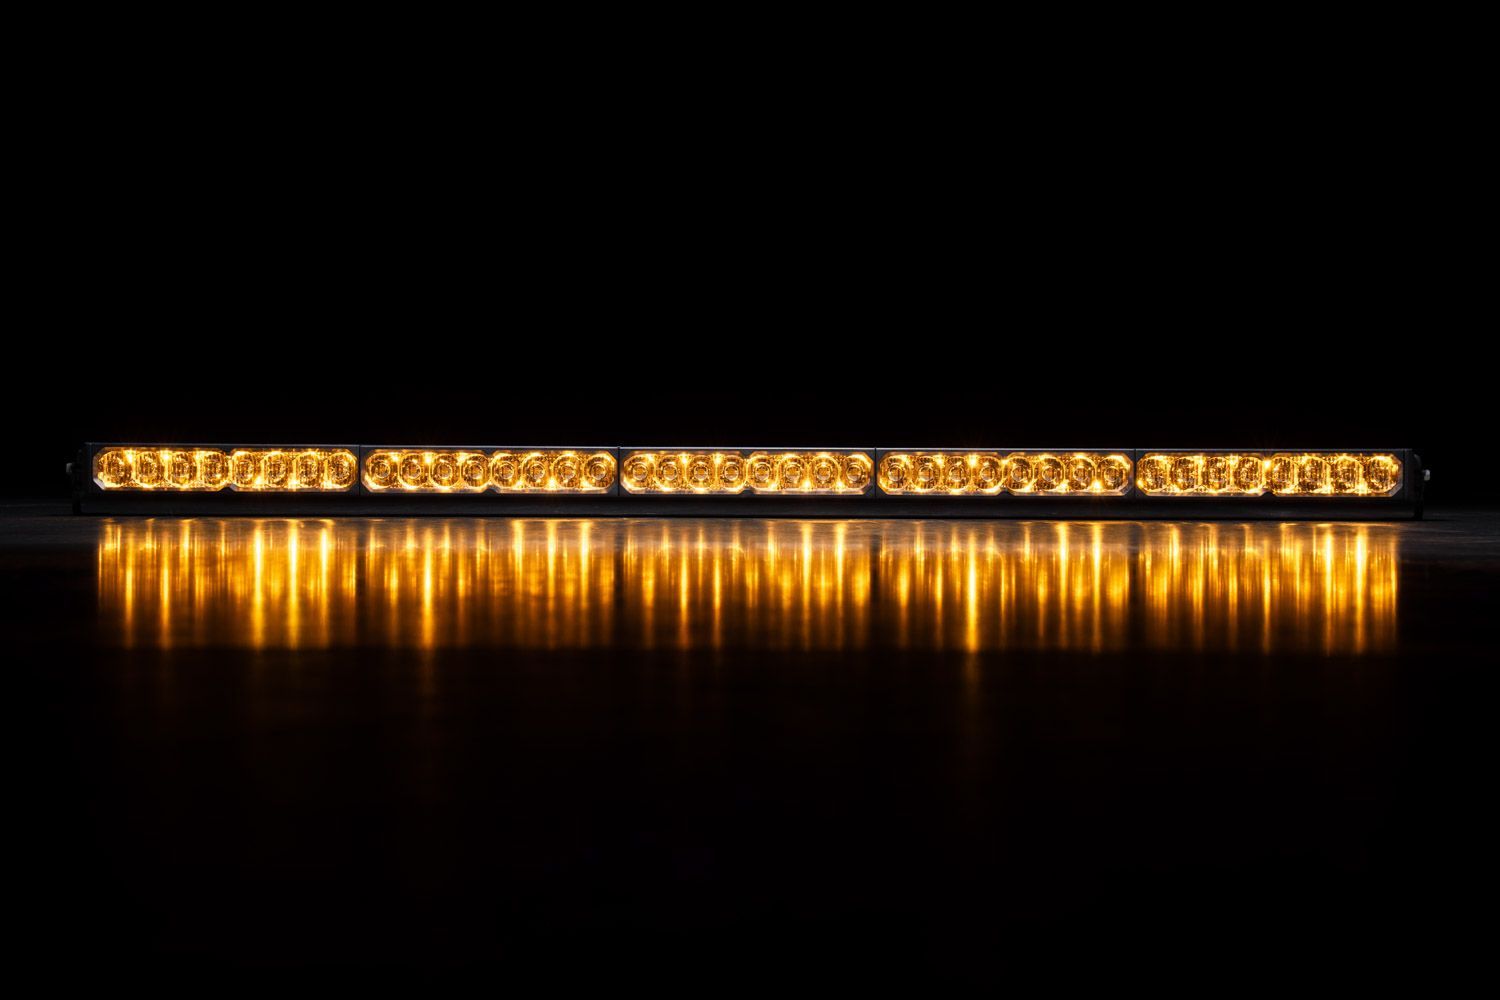
SmartSelect Programming
Stage Series Lightbars equipped with SmartSelect feature built-in programming for both the main beam and the backlight. Programming is performed using simple power cycles and works with any control method, including toggle switches, relay harnesses, or switch panels.
A built-in timing delay is included to prevent accidental programming from strobe functions or rapid switching. Each power cycle must be deliberate, with approximately one second between each ON press.
Main Beam Programming (SS30 and Larger SmartSelect Lightbars Only)
SmartSelect allows control over how the main beam operates. Depending on configuration, the lightbar can be set to run inner sections only, outer sections only, or the full bar.
-
Start with the main beam powered OFF.
-
Turn the main beam ON and OFF four times, spacing each ON press about one second apart.
-
On the fourth power cycle, the lightbar will enter programming mode.
-
Continue cycling power at the same steady pace to scroll through the available modes.
-
When the desired mode is displayed, leave the main beam ON.
-
After several seconds, the selection will save automatically and exit programming mode.
The selected mode will be retained during normal operation.
Backlight Color Programming
SmartSelect backlights offer multiple color options, including White (default), Red, Blue, Green, Purple, Yellow, Amber, and Teal.
-
Start with all backlight power OFF.
-
Cycle backlight power ON and OFF three times within three seconds, spacing each ON press about one second apart.
-
After the third cycle, the backlight will enter programming mode.
-
Continue cycling power at the same steady pace to scroll through the available colors.
-
When the desired color is displayed, leave the backlight ON.
-
After five seconds, the color will save automatically and exit programming mode.
-
Turn power OFF.
The selected color will appear any time backlight power is applied during normal operation.
Backlight Color Reset
If multiple SmartSelect products are connected to the same backlight circuit and colors become unsynchronized, perform the following reset procedure.
-
Enter backlight programming mode by cycling power ON and OFF three times, using the same one-second timing.
-
Continue cycling power through all available colors twice. This requires at least sixteen total power cycles.
-
After all colors have displayed twice, all connected lights will reset to White.
-
Leave the backlight ON for five seconds to save the reset.
-
Program the desired backlight color as outlined above if needed.
Questions About the Installation?
If you have any questions or issues installing the Stage Series Lightbars, please contact us for further information.
Where Can I Buy a Stage Series LED Lightbar?
If you're ready to upgrade your vehicle with Stage Series Lightbars, you can purchase them by clicking here, or by using our dealer locator to find a dealer near you.
Want to know more about Diode Dynamics products? Visit DiodeDynamics.com and subscribe to our newsletter for new product releases and more!
This Installation Guide is for the following SKUs: DD8180, DD8181, DD8182, DD8183, DD8184, DD8185, DD8186, DD8187, DD8188, DD8189, DD8190, DD8191, DD8192, DD8193, DD8194, DD8195, DD8196, DD8197, DD8198, DD8199, DD8200, DD8201, DD8202, DD8203, DD8204, DD8205, DD8206, DD8207, DD8208, DD8209, DD8210, DD8211, DD8212, DD8213, DD8214, DD8215, DD8216, DD8217, DD8218, DD8219, DD8220, DD8221, DD8222, DD8223, DD8224, DD8225, DD8226, DD8227, DD8228, DD8229, DD8230, DD8231, DD8232, DD8233, DD8234, DD8235, DD8236, DD8237, DD8238, DD8239, DD8252, DD8253, DD8254, DD8255, DD8256, DD8257, DD8258, DD8259, DD8260, DD8261, DD8262, DD8263, DD8264, DD8265, DD8266, DD8267, DD8268, DD8269, DD8270, DD8271, DD8272, DD8273, DD8274, DD8275, DD8375, DD8377, DD8378, DD8379, DD8380, DD8381, DD8382, DD8383, DD8385, DD8386, DD8387, DD8388, DD8389, DD8390, DD8391, DD8392, DD8393, DD8394, DD8395, DD8396, DD8397, DD8399, DD8400, DD8401, DD8402, DD8403, DD8404, DD8405, DD8406, DD8407, DD8408, DD8409, DD8410, DD8411, DD8413, DD8414, DD8415, DD8416, DD8417, DD8418, DD8419, DD8420, DD8421, DD8422, DD8423, DD8424, DD8425, DD8427, DD8428, DD8429, DD8430, DD8431, DD8432, DD8433, DD7781, DD7782, DD7783, DD7784, DD7785, DD7786, DD7787, DD7788, DD8644, DD8645, DD8646, DD8647, DD8648, DD8649, DD8650, DD8651, DD8652, DD8653, DD8654, DD8655, DD8657, DD8659S, DD8781, DD8801, DD8815

Share This Post